Even wash
💧 Water: dry paper, well-loaded damp brush.
🎨 Pigment: one colour only.
🖌 Brushwork: work in horizontal bands, keeping a small bead of water along the edge.
Look for: an even surface with no dry joins.
Workshops to Pass On · Eaux de Velours
Learn to work with water, pigment and colour mixes, then create a real painting.
Before painting a landscape, learn to let the water do some of the work. Prepare a practice sheet, a round brush, two jars of water and one colour.
💧 Water: dry paper, well-loaded damp brush.
🎨 Pigment: one colour only.
🖌 Brushwork: work in horizontal bands, keeping a small bead of water along the edge.
Look for: an even surface with no dry joins.
💧 Water: gradually add water to the mixture.
🖌 Brushwork: begin with stronger colour at the top and work down without going back over it.
Avoid: scrubbing an area that has started to dry.
Deliberately leave areas of white paper. In watercolour, the brightest light is not painted: it is preserved.
Exercise: create three small clouds simply by painting the sky around them.
The Knight’s rule of thumb: if an area still shines, it is wet. Once it turns matt, let it dry before touching it again.
These four techniques are enough to build a convincing landscape. Make a small practice square for each one before starting the painting.
Wet the paper with clean water first, then add pigment. The edges soften and spread: ideal for skies, distant shapes and masses of trees.
💧 plenty of water · 🖌 place the colour, do not scrubApply pigment to dry paper. Edges stay crisp: perfect for the bridge, boat, reeds and details.
💧 moderate water · 🖌 precise brushworkOnce a layer is completely dry, add a transparent wash over it. The colours build up without losing their luminosity.
⏱ let the previous layer dry completelyWhile an area is still damp, rinse and blot the brush, then gently lift pigment to bring back a highlight.
🖌 clean, almost dry brushLook at the whole painting first, then build it from the softest shapes to the sharpest details. The aim is not to copy every leaf, but to create depth, water and light.
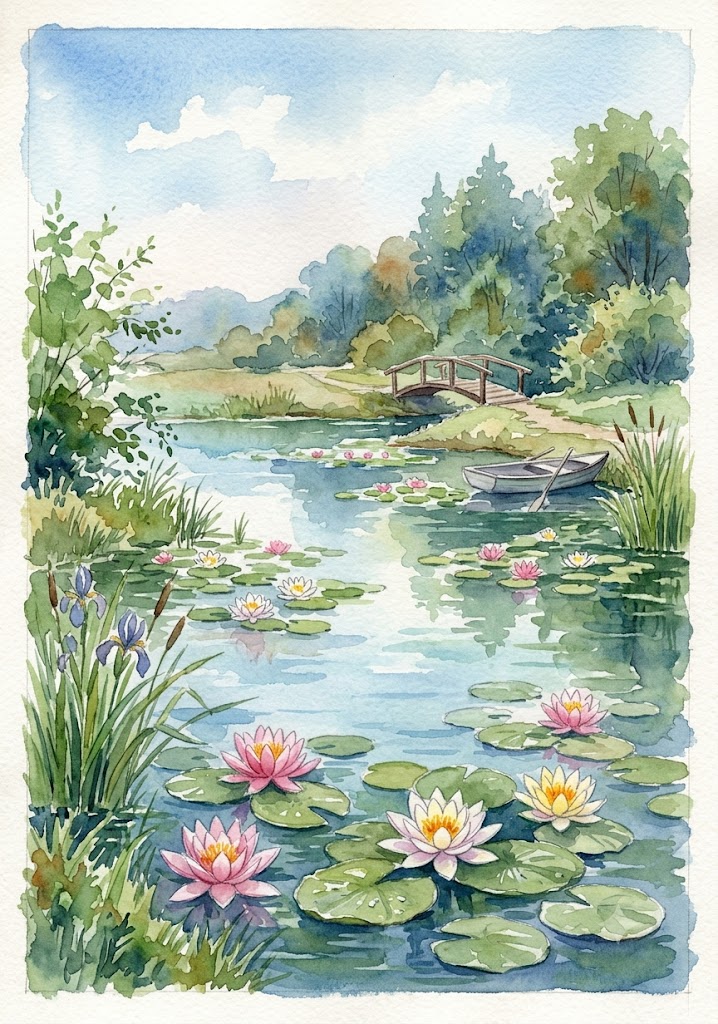
Technique: wet-on-wet. Wet the sky with clean water. Add a very diluted blue at the top and leave white reserves for the clouds.
💧 plenty of water · 🎨 very little pigment · ⏱ let it dry
Lay in very pale blue-greens. Keep details and contrast low: distant areas should remain light.
🖌 soft strokes · 🎨 blue + muted green
Work in masses rather than leaf by leaf. While the first layer is still damp, drop cooler greens into the shadows.
💧 damp · 🎨 several greens · keep the variation
Use horizontal strokes. Echo the colours of the sky and banks in the water, lighter and more diffused.
🖌 horizontal strokes · preserve flashes of white paper
On dry paper, place the large leaves as irregular ellipses. Vary their size, value and direction. Add the flowers afterwards.
🖌 wet-on-dry · work from large shapes to small ones
Only now add the sharpest lines and darkest accents. A few well-chosen details are enough to make the whole landscape convincing.
🎨 stronger pigment · 🖌 fine brush · know when to stop
Tip: take a photo of your painting after each stage. On screen, it is easier to spot an area that has become too dark or too detailed.
3 · A4 TEMPLATE
The template now starts from the actual reference painting. First observe the composition and the light and dark masses, then open the generator to create a numbered template from this image.
Your image stays with you. It is processed directly in your browser and is not stored on the website.
Move the image within the frame and adjust the zoom. Only the visible area will be transformed.
Click and drag the image to choose the framing.
Choose a photo to begin.
WATERCOLOUR MODE
Keep the colour model as your reference. The colours are grouped into successive layers: main shapes, nuances, shadows and then details.